Why Good Traders Still Lose Money
October 28, 2026
By Hyperdash
You can call the move on the S&P 500 perfectly and still end the day with a loss.
Price can run in your favor and come all the way back before you close, turning a winning trade into a losing one. Or it can go against you, yet you hold on hoping it comes back and a small loss turns into an account wide liquidation.
Published
October 28, 2026
Author
Hyperdash
Reading time
4 min read
Category
Tools & Data
Take profit and stop loss orders define your exit before the trade starts, so your plan runs even when you are not watching the screen. They are the simplest risk management tools you have, and among the easiest to skip when you are starting out. Reducing the emotional burden of decision making during trading is one of the most long term positive impacts you can have on your performance.
In this article, I'll show you how take profit and stop loss orders work and how to utilize them on Hyperdash to improve your trading.
How Take Profit and Stop Loss Work
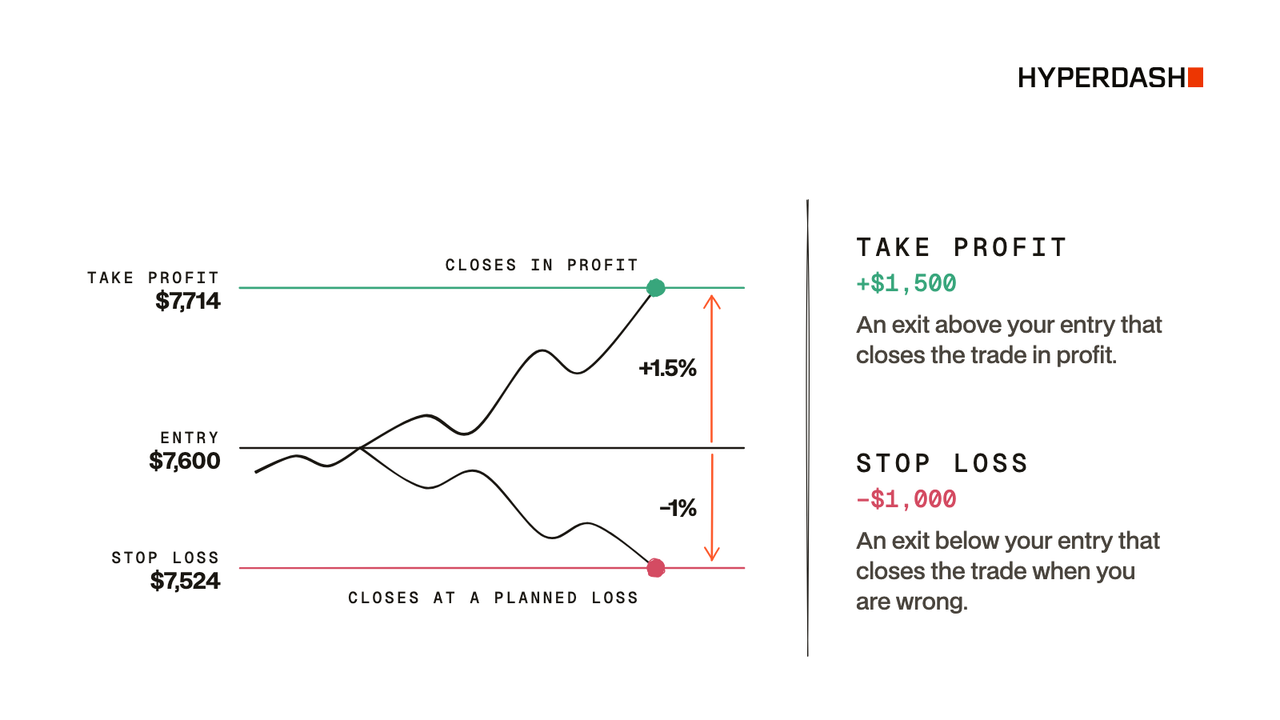
A take profit is a price trigger you set to exit the trade when you are in profit. A stop loss is the opposite, triggering the closing out of the position at a predefined loss amount. On a long, your take profit sits above your entry and your stop loss sits below it. On a short, it is the other way around.
Neither one rests on the order book while you wait. When price reaches your level, the exit triggers and closes the position. By default that is a market order, but on Hyperdash you can also run each exit as a Limit, Chase or TWAP order, so a larger position can be worked out of the market instead of hitting the book all at once.
Setting Your Take Profit and Stop Loss
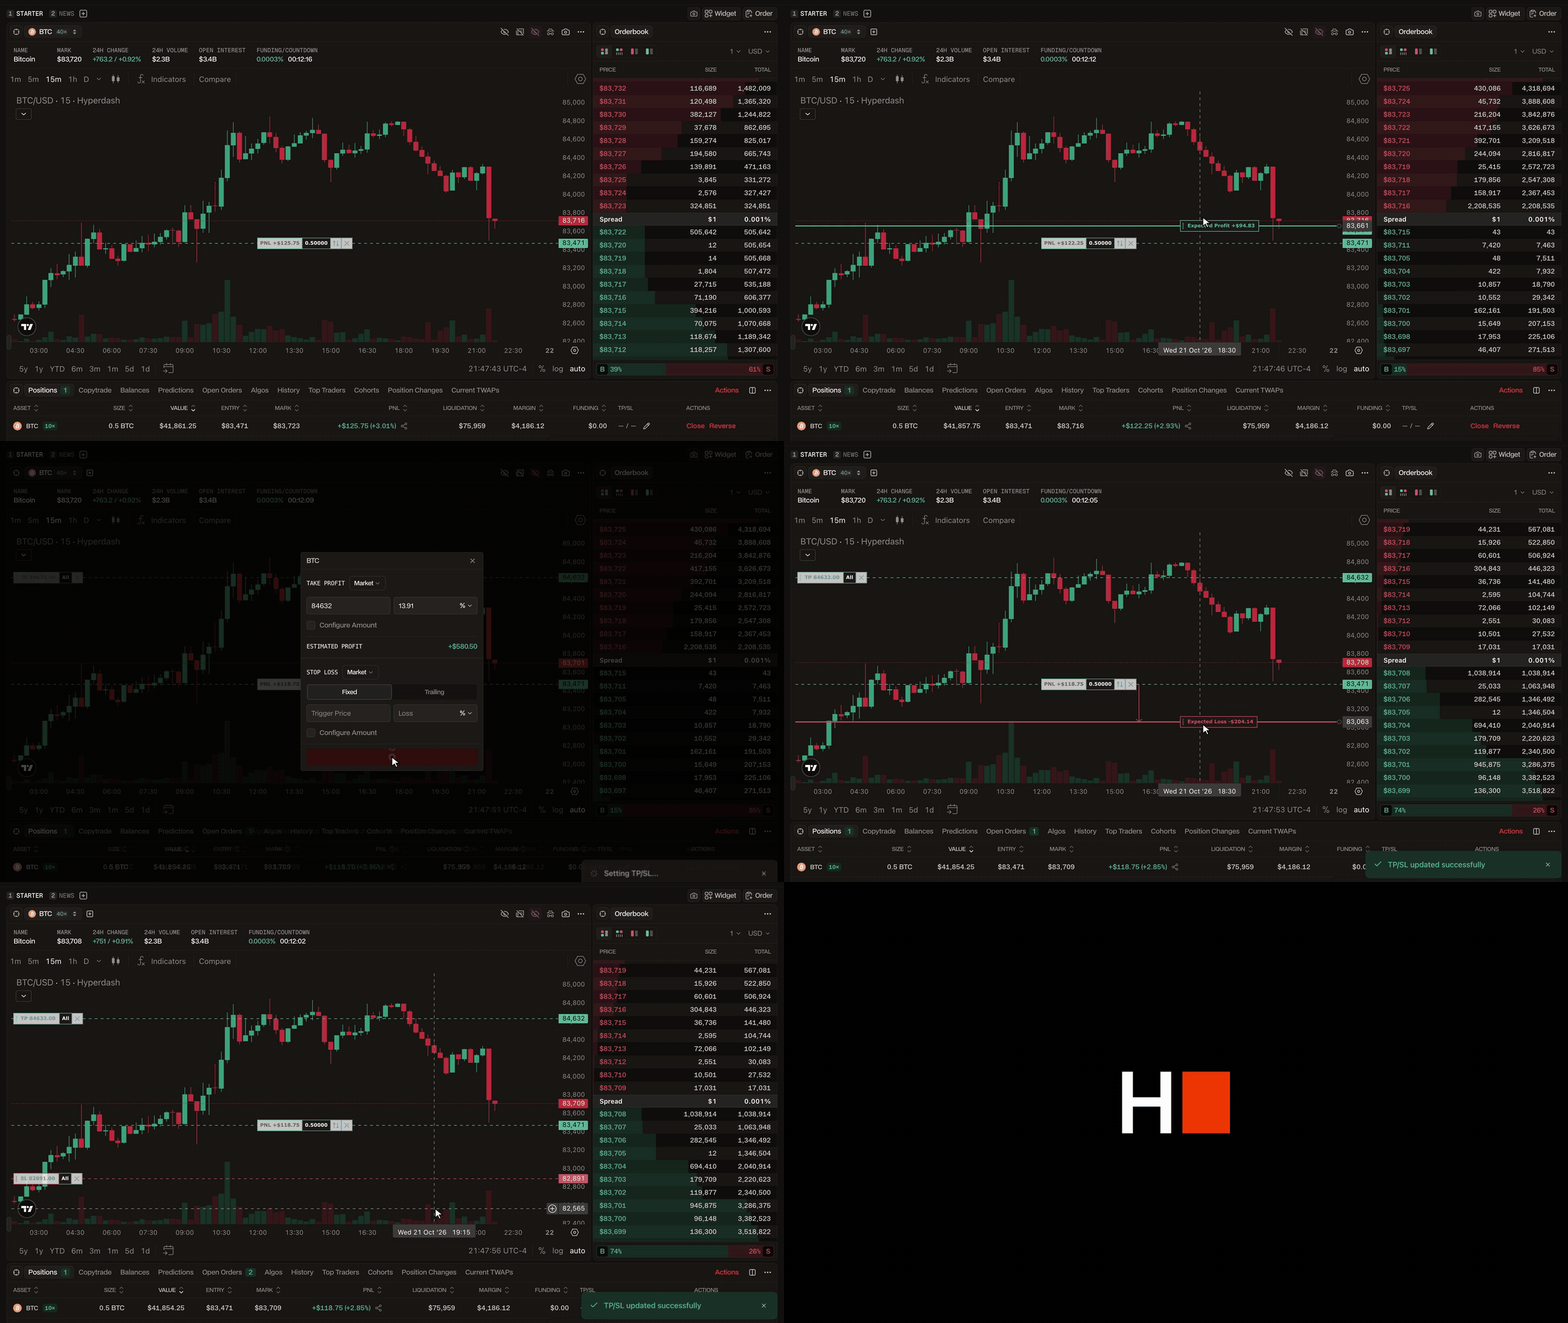
When entering your trade information, click the TP/SL in the order form and either enter a price or a defined gain/loss you want. Your estimated liquidation price will show beneath the order button so you can see how far your stop is from it before you place the trade.
If you have a live position, you can also set/edit them straight from the chart. Hover over your position line and drag the handle up to set a take profit or down to set a stop loss. A window opens where you can confirm the price, see your estimated profit or loss, and choose which algo the exit fills with. Configure Amount lets you close only part of the position, and the stop loss can be Fixed or Trailing.
The Trade Setup
Say you have $5,000 in your account and you open a $100,000 long on SP500 at $7,600, using 20x leverage. Every 1% move is a swing of $1,000 PNL for you.
You set a take profit at $7,714, 1.5% above your entry, and a stop loss at $7,524, 1% below it. If you are right you profit $1,500, and if you are wrong you lose $1,000. Before you enter, ask whether the move you expect is worth the distance to your stop. If it is not, that is a trade worth skipping.
When Price Goes Your Way
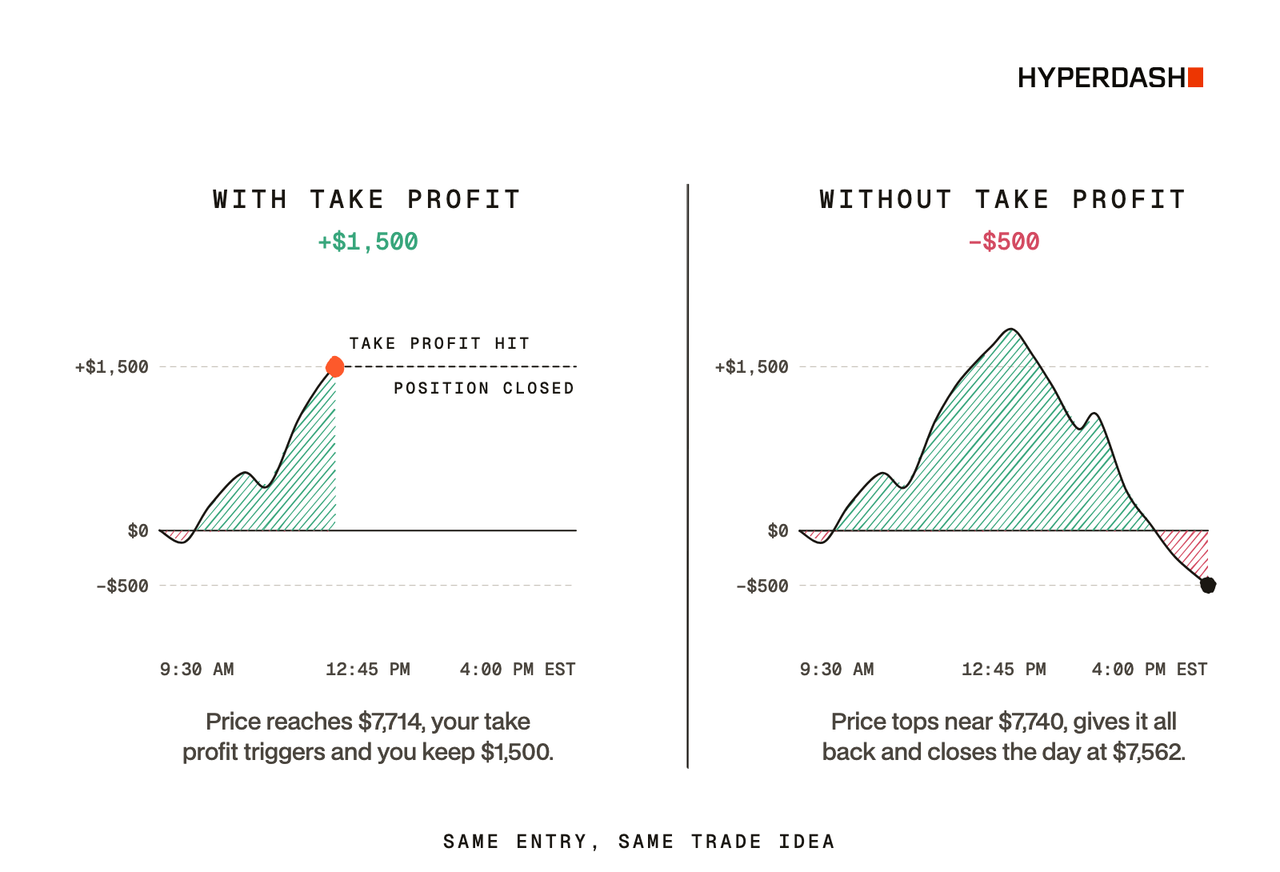
Now using the same trade example, let's say price rallies into midday and reaches $7,714. Your take profit triggers and you are closed out with a gain of $1,500.
Without a take profit, you are still in the trade when price tops out around $7,740 and turns lower. By 4:00 PM EST it has given back the whole move and is trading at $7,562. The trade that would have made $1,500 ends the day down $500.
When Price Goes Against You
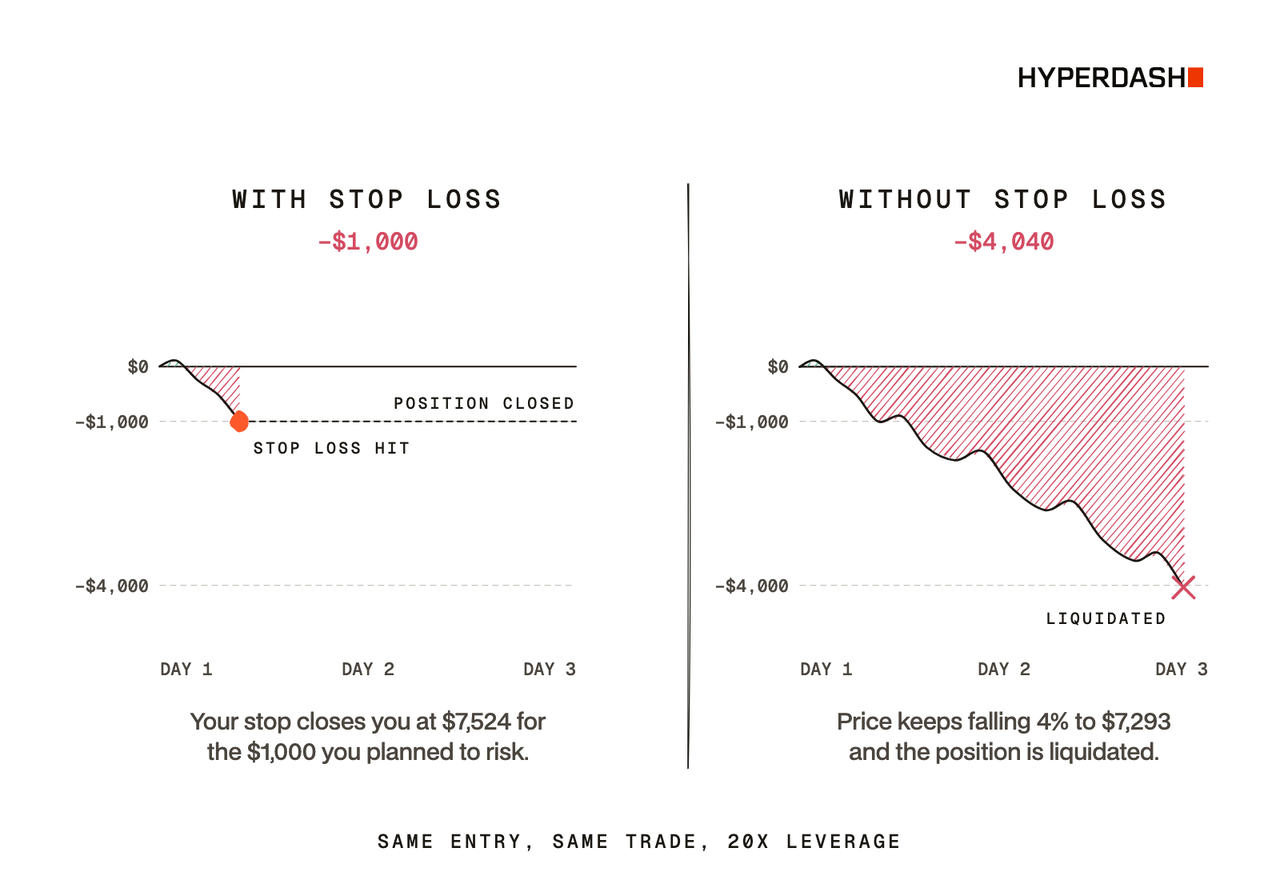
Now say price falls right after you enter. It reaches $7,524, your stop loss triggers and you cut with a loss of $1,000. That is the loss you planned for, and the rest of your account is still there for the next trade.
Without a stop loss, you are still in the trade as price keeps falling over the next few days. At 20x, a drop of about 4% to $7,293 takes you to the maintenance margin and the position is liquidated. The same trade that would have cost you $1,000 now costs you $4,040, most of your account.
Placing Your Levels
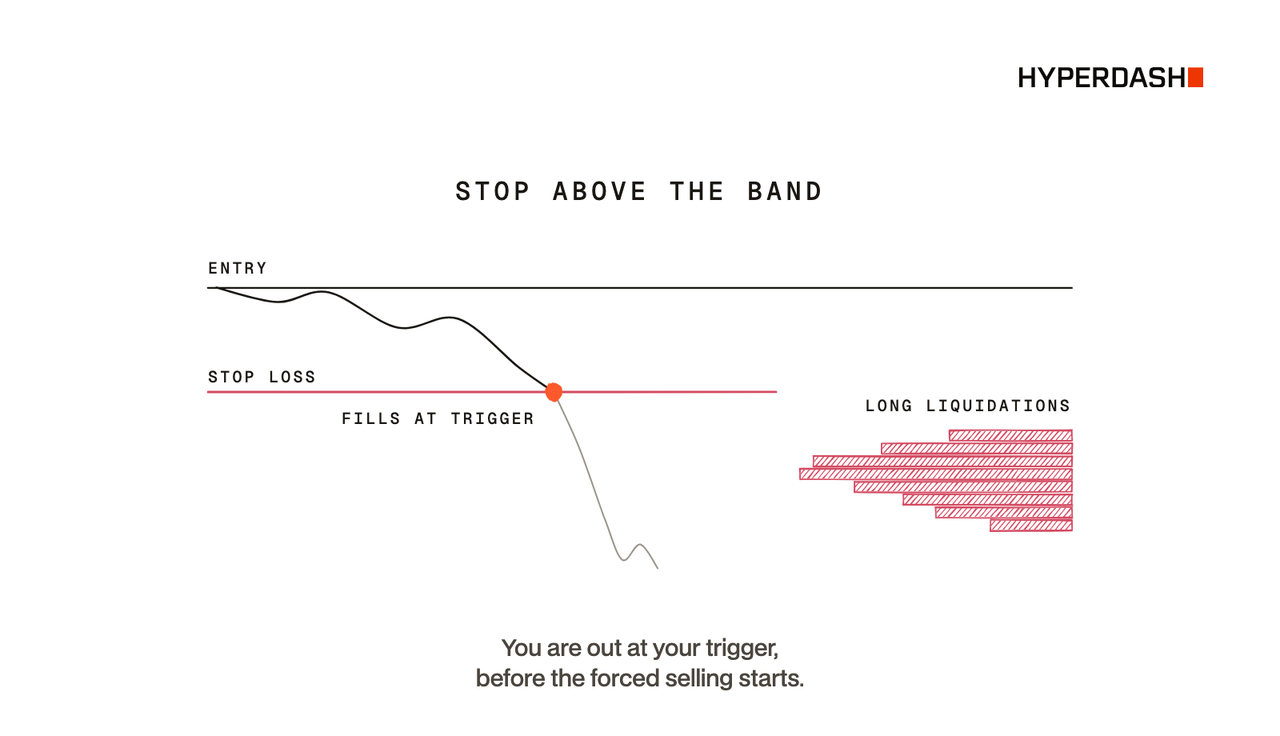
I put my stop at the price where my trade idea is wrong, then size the position so that loss is one I can take. Before entering, I check the liquidation heatmap and position changes data from our prior lessons. If a large band of long liquidations sits below my entry, I keep my stop above it, so I am out before the forced selling starts instead of filling in the middle of it. The tradeoff is a tighter stop that a quick dip can take out, so be mindful of this as you incorporate these tools into your trading and adjust accordingly.
Setting your take profit and stop loss on Hyperdash before you enter means you know your exits and your risk up front, and you keep more of what your good trades make.
Trade smarter with Hyperdash today.